


![]()
![]()


![]()
![]()
![]()
Skyjacker 2" spacer lift

Last update; 23 May 2008 08:50:47
Skyjacker 2" spacer lift
This has been something that I've been thinking about pretty much since I bought the Monster back in 2003. Part of this was the CD-ROM included in SI 1 of JRations documenting the installation of just such a lift. It seemed like a reasonably uncomplicated deal, so I purchased the parts from Quadratec, and here's how it went together
As I stated above, the JRats CD-ROM indicated that this was fairly simple. And it was.... mostly. There were some issues not indicated in the CD, and unfortunately, there were no instructions of any kind in the kit, so there were some things that I needed to learn on my own. (pretty much the way things always go) And the CD wasn't always the most accurate info, especially when I first tried to install the left-front shock. The CD stated that the easiest way of getting the polyurethane bushings into the shock eyes was to use silicone spray to lube them and then to insert the bar and then to install the bar/bushing combo into the eye. (Here's where I rant a bit- why are these NOT done at the factory?) My experience was that a little massaging on all the above-mentioned parts with my Dremel was necessary to get them all to go into their respective places. This part of the learning process took a good hour or so to get figured out, with my trying to follow the CD, but then figuring out that it just wasn't working. Also, the re-installation of the springs was just not gonna happen without a spring compressor. Unfortunately, the 1st one I rented at Advance Auto was not appropriate, as it was meant to be applied to the spring from the inside. So another trip to AAP netted a compressor intended from MacPherson struts, and this worked much better. Oh, BTW, the CD made no mention of the necessity for this, just a vague reference to having friends help you with putting the spring in. This was a solo project, so that wasn't feasible. Because of all this fooling around, the left front took a good bit of a day to do. Thankfully, the right front went much smoother, and along with the installation of a new steering stabilizer, took about 3.5 hours the next day. This was unfortunately extended by another useless trip to AAP for a ball joint remover to take off the steering stabilizer. And of course, it didn't work, so I used the old BFH and got it off the old-fashioned way.
At first glance, the rear looked to be not too hard to do, except for the shocks, which looked to be a major pain in the tookus. Turns out, it was much easier than the front end. Since the rear coil springs are much shorter than the fronts, getting everything apart and reassembled was a relative breeze. You may notice that I left the shock boots off of the rears since with them on, I couldn't even see the upper bolts, much less tighten them.
I was pleased with the difference the Skyjacker lift made in not only the look of the Monster, but the ride as well. I had not realized how badly the stockers were worn until I actually got them off of the Jeep. The word limp comes to mind here. Anyway, even though I sit here writing this with sore arms, shoulders and back from manually wrenching this sucker back together, I'm glad I did it. And, I had considered possibly going up a couple of more inches somewhere down the road, but for now I'll just leave it as is. However, there is a bit of a vibration on initial acceleration. I believe that I may have to drop the transfer case a bit and restore the driveline angles. Stay tuned for how that all worked out!
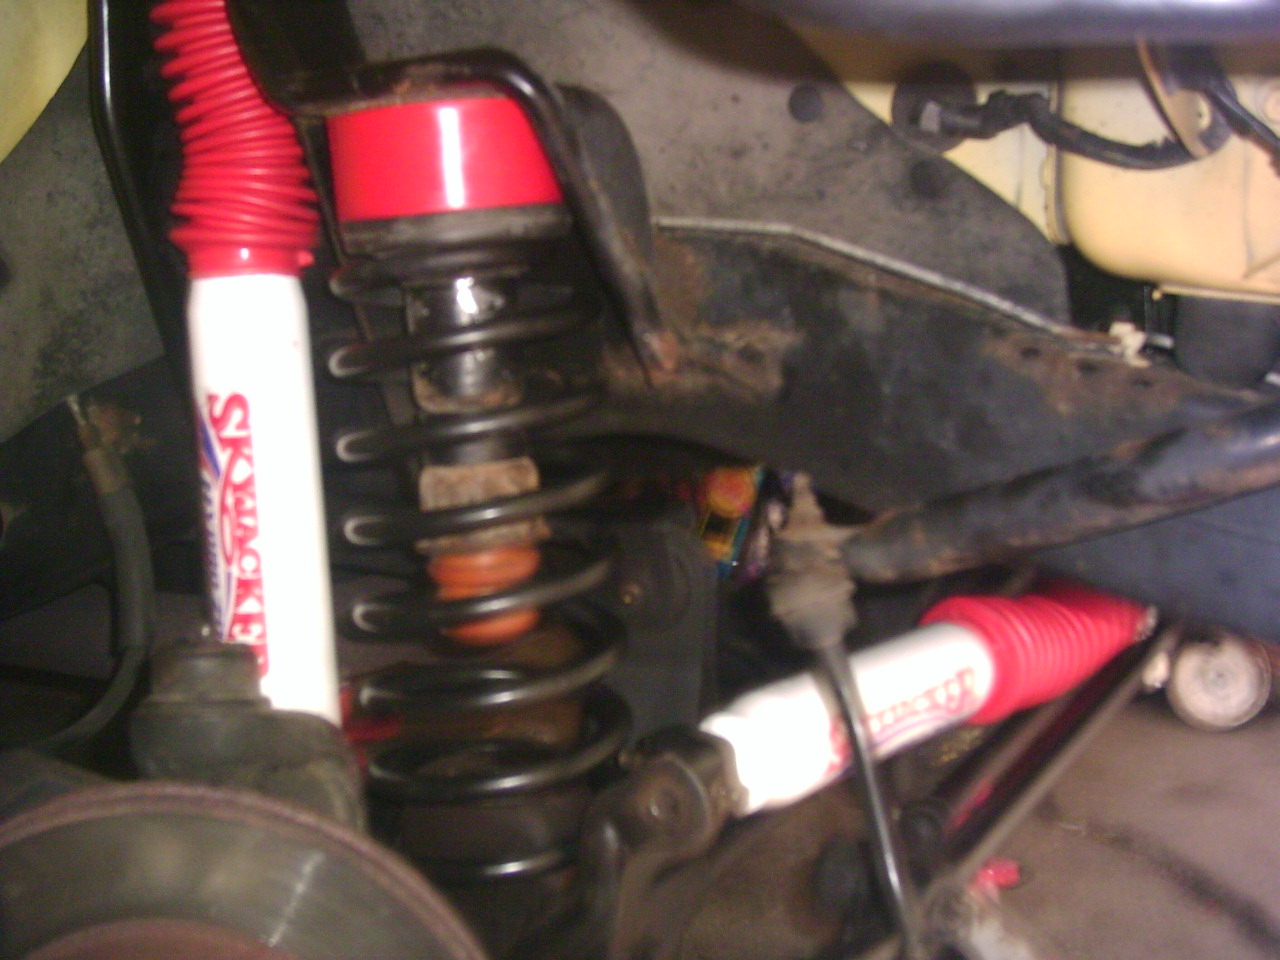
Front

Rear
I like it!